0330 113 4909

How to Paint Stairs the Right Way
Painting stairs doesn't have to be a laborious or inconvenient task. Knowing how to correctly paint your stairs can be the difference between creating a stunning entrance to the upper floors of your house as well as enhancing the appearance of your hallway.
Over time, every staircase will be subject to damage and general wear and tear, whether you're painting wooden stairs, metal, or any other stair type. This is why it's important to know how to paint stairs correctly, to ensure the appearance of your metal or wood stairs continues looking great for years to come.
Our guide is designed to help any person, regardless of their DIY skill set, successfully paint their stairs. Whether it's applying a new white coat to your staircase to freshen it up, or you're looking to transform its appearance altogether.
Let's begin.
First, decide what you're looking to achieve when painting your wooden stairs
Take a look at your current metal or wood stairs, what kind of condition are they in? Do they have carpet, stair rods or runners fitted and if so, do you want to/need to remove the carpet to paint around the carpet? If:
Your wooden staircase features a carpet stair runner - you may consider replacing the carpet runner entirely if it's an old runner. If not, your other options would be to paint around the carpet, or remove it, paint the whole wood staircase and then refit the runner.
Your staircase is made from chipboard or lower grade woods, you should paint the treads and risers for a complete finish.
Have nice wood on your treads? No problem!
Don't be afraid to stain your treads and then paint the risers and sideboards in a complementary colour. The condition of your wood doesn't have to be perfect, you can still apply a stylish colour to the treads that really brings out the overall appearance of your staircase. Take a look at colour wheels to get an idea of what colours compliment each other to maximise this effect.
Preparing your old stairs for Painting
The preparation stage is crucial to ensure you're able to properly paint your staircase and achieve your desired finish.
Step 1
If nails, staples or any fixings are present, remove these and clean your staircase. If dust or any old fixings are left, it can cause the paint to peel and not bind properly to the staircase. It will also generally look poorly painted upon completion.
Step 2
Next, sand down the treads and any rough areas of your staircase to get a smooth finish. This makes it ideal for painting as you will encounter fewer rough patches and the overall appearance will look far more professional upon completion. You can either use sandpaper (better for the tough-to-reach areas) or you can use a sandbelt for the actual stairs (easier to plane this way).
Step 3
Be sure to sand down the riders and sideboards. These are often neglected and while they are usually in better condition than the stairs, you may find some rough patches here and there. Once sanded, vacuum everything and the painting can begin.
Choosing your paints
Do your research and try out some tester paints on your stairs before committing to a colour. If your staircase has seen some wear and tear over the years, we'd advise going for a darker colour to mask any imperfections.
If your staircase has been properly looked after and sanded, then choose any colour you want. You may choose to apply white paint to your staircase and paint the skirts and rafters blue for a contrasting finish. Ultimately, it's up to you what colour you choose to paint your stairs, but take inspiration from a colour wheel if you're struggling.
Consider adding a stainer
This isn't essential, but adding an oil finish can bring out the wood grain and really make it stand out against other colours (or even on its own). Staining won't affect the durability of your stairs, it's purely aesthetic.
How to paint stairs and apply the stainer
It is crucial that you stain the wood before you begin painting - this way, it's far easier to clean the paint off the wood finish (than the other way around). The stainer is easy to apply, simply use a brush, stroking back and forth across the stairs and then leave it to saturate into the wood for a few seconds. Then, wipe clean with a cloth.
It's highly recommended you apply at least three coats when it comes to painting wooden stairs - purely due to the amount of foot traffic. This way, your stairs' appearance will continue to look great over time. Allow the stain to dry for several hours before stepping on it, as this will damage the paintwork and the aesthetic.
Next, you will need to apply a urethane finish (clear oil), this will help to protect your stairs from constant foot traffic and general wear and tear. You will find that with all oil urethane-based finished that they will give off a slightly yellowish tint, which is ideal for antique looks. Be sure to apply around three to four coats of this to ensure your wooden stairs (old or new) are well protected.
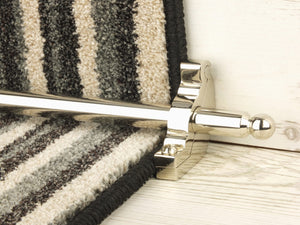
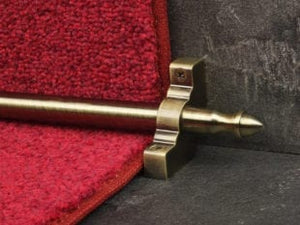
Looking to add stair runners, rods or bars to your new staircase?
Now that you're happy with your staircase's new colour scheme, why not go the extra mile and complete the look with a stunning stair runner? We stock a wide variety of beautiful runners, rugs, bars and rods to further enhance your staircase. Choose the right design and colour from over 200 products to transform your hall stairs and the interior of your property.
Need help choosing a design or figuring out measurements? We can help! Get in touch with our team for fittings information.
Alternatively, take a look at our range of bespoke designs.