0330 113 4909

How to Install Stair Nosing - An Easy Guide from our Experts

Here at Stair Rods Direct, we supply all types of stair nosing to really enhance the look of your stairs. After purchasing your stair nosing, you of course then need to have them fitted. If this is a job you are prepared to take on yourself, we've provided an easy guide to walk you through the process.
What is stair nosing?
The purpose of stair nosing can be to enhance the staircase in your property aesthetically, but also adds some safety benefits - such as preventing slips and falls. Whether you simply want to give your hallway, landing, floating floor, or staircase a visual upgrade, want to add some extra decorative pieces to this part of your home, or want to increase the safety of your staircase, stair nosing is a great addition for for all domestic, commercial, or industrial properties.
When you choose to fit stair nosing to the staircase on your property, you will need to follow some guidelines to ensure the nosing meets building regulations; and is also correct for the type of footfall your stairs will have. It will also have to meet the required standards for internal or external fittings.
Below, we explain the different types of stair nosing, as well as a step-by-step guide on how to correctly install your new stair nosing.
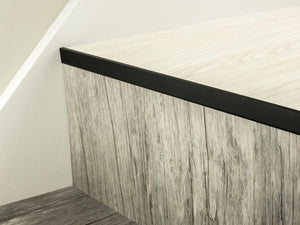
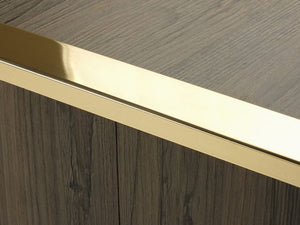
What Are the Different Types of Stair Nosing?
Prior to beginning any kind of work on your staircase, you'll need to make the choice of what kind of stair nosing, and treads and risers, you require, and whether your choice of nosing and tread material is suitable for interior or exterior settings.

There are multiple types of stair nosing, such as:
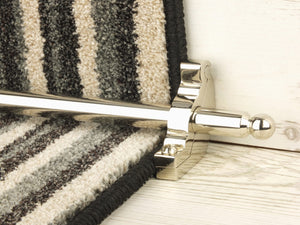
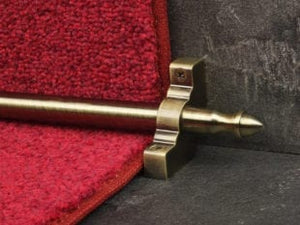
- Bullnose stair nosing
- Heavy duty anti-slip stair nosing
- Infill stair nosing
- Single or double channel stair nosing
- Ramped Edge stair nosing
The stair nosing you choose will also be affected by the type of floor covering you already have. You must take into consideration what kind of surface or covering the stair fixing will need to be fixed to, for example:
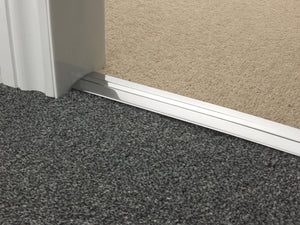
- Tile
- Carpet
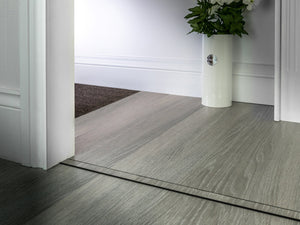
- Wood
- Metal
- Vinyl
- Rubber
- Laminate
Preparing the Surface for Stair Nosing
Whether you're installing anti slip stair nosing on solid wood, hardwood flooring, or laminate flooring on stairs, stair nosing is a great slip resistant solution to prevent any slips and falls from tripping hazards on your property.

When fitting the stair nosing, preparation is key. The same rings true for any manual labour jobs. It's important to recognise that you may require a different approach to preparation and installation due to the location of where the nosing will be. Whether the stair nosing will be for internal or external use, and what material the stairs are made from, will require different approaches to preparation and installation.
It is recommended, however, that you use a primer whilst preparing the stairs - no matter what surface the stair nosing is being installed on. This will be particularly important if the overall condition of the stairs is poor.
Preparation for Concrete Stairs
When preparing concrete stairs to install stair nosing, it will be necessary to ensure the step is levelled correctly and free from cracks. It must also be completely clean, with dust removed, prior to installation. If you need to repair the step, follow the manufacturer's concrete guidelines, and have been given plenty of time to dry and harden.
Preparation for Metal Stairs
Metal stairs will need to be cleaned and smoothed. They must also have any rust or debris removed. The metalwork should be galvanised and can be powder coated to a colour of your choice - to match the nosing of your choice.
Preparation for Wooden Stairs

As with concrete stairs, it is important to ensure that the wooden stairs are clean, being free from dust and cracks. If there are cracks, it is a great idea to use a strong wood filler. Allow the filler to dry and harden, then lightly sand to a smooth finish. If you have any wooden stair treads or risers, they should also be sound, without any evidence of rot or woodworm infestation.
Measure the Stairs Accurately
In order to ensure you save time and effort further down the line of installation, it is important to measure your stairs accurately - this means measuring every step individually as there may be subtle differences. Because of these differences, you may need to cut more from the stair nosing strip. If you don't measure, you may end up having cut too much off at the start.
Preparing to Cut the Stair Nosing
Some stair nosing can be supplied at pre-cut lengths. However, if you are cutting the stair nosing to the lengths required yourself, be sure to accurately mark the measurements and double check them before making the first cut. Remember, even being slightly out can ruin the final product.
Dry Fit the Stair Nosing First
Before making any final fixings with construction adhesives and screws, we advise that you dry fit the stair nosing first. This will ensure that everything is measured correctly, and you don't accidentally commit to stair nosing with the wrong measurements.
Fixing the Stair Nosing

Now you've reached the point to fix and attach the stair nosing to your steps. Reaching this step brings you a few different options for you to consider.
Standard Nosing Types , Drilled and countersunk fixings, which are visible when finished.
Infill Nosing , Nosing drilled and fitted and then infill secured, allowing for more obscure fixings which are hidden by the infill.
It is important to ensure that any riser fittings you install are completed before you commence the fitting of the stair nosing proper.
If you're fixing the stair nosing to a concrete or metal staircase, make sure to use the cut to size nosing as a template to measure out any screw holes into the correct spacing.
After marking the correct positioning of the screw holes, carefully drill the holes using the template. After, carefully apply the adhesive to the stair nosing and treads. It will make life far easier to start at the top step and work down, as this will reduce the risk of knocking the stair nosing below as you work up.
After applying the adhesive, firmly press down on the stair nosing and screw it into position. Once the screws are in place, move down to the next step and rinse and repeat the application steps for the remaining stair noses.
Before you move on to the next steps however, make sure any excess adhesive is cleaned off whilst it is still wet in order to keep the stair nosing looking high quality. It is better to do this while the adhesive is wet, rather than dry.
Leave to Dry and Harden
Once the stair nosing has been completed, it will need plenty of time to ensure the adhesive fully sticks to the surface. For a general guideline, it will take about 1 hour for stair nosing to fix to an absorbent surface, and about 2 hours for a non-absorbent surface.
Different types of stair nosing, such as the heavy duty types, may need additional time to dry and harden, so ensure you have enough time before allowing footfall.
Conclusion
Hopefully, you now know all you need to know when it comes to installing stair nosing on your stairs. We are, of course, happy to offer advice should you need it, and we also have a great selection of stair nosing products on our website.