
How to Stop Stairs Creaking, Permanently
While creaky stairs aren’t necessarily a problem, they can become a nuisance. Creaky stairs can occur for a few reasons, but the most common reason your stairs may start creaking is due to wear and tear and high levels of foot traffic. This can cause fixings to become loose, dry out or become damaged, which can cause creaking to wooden stairs.
Fortunately, there are a few solutions to squeaky stairs, and simple ones at that. To find out what’s causing creaky stairs, you’ll need to inspect above and below your staircase.
How to Stop Creaking Stairs from Below
Step 1
The first step is identifying the loose stairs, or at least where the noise is coming from (it’s usually from one or two stairs, they don’t have to be next to each other). It helps if you have someone listen from underneath and mark out the areas where your wooden stairs are creaking. You might find that the stair tread or riser has become loose at the part where the glued wedge supports the joint. If this has happened, simply remove the wedge, clean it, apply some new wood glue and fix it back into its original position.
Step 2
Once the wedge has been glued back on, identify the triangular block that should be positioned at the angle between the treads and the risers. Again, if these are not glued on properly, simply remove and clean them. Then, open them up, line some glue where the old glue or adhesive used to be.
Step 3
When the glue or adhesive has set, apply the block back onto the stairs. If your stairs do not have any blocks (none were ever attached), then you will have to make some, which is very easy. The blocks should be around 75mm long and can be made from scrap wood. Once made, glue and position them in place.
Step 4
If the joint is still too weak or needs reinforcing, apply some glue between the back of the tread and the bottom of the riser. Next, grab three screws (preferably the same type and size) and drill them up through the tread and into the riser. The combination of glue and the three screws will give ample reinforcement to the block and should stop your wooden stairs from creaking.
How to Stop Creaking Stairs from Above
If you are unable to access your stairs from below, there are solutions for fixing wooden stairs from above.

Step 1
A great way to fix creaking stairs from above is by checking if the tread is loose from the riser. To do this, identify where the creaky noise is coming from and try lifting the tread. If it makes a noise as you lift it, it’s likely it’s loose. To fix this, you can screw the front of the tread into the riser for added stability. To ensure this is done safely and correctly to not spoil the appearance of your staircase, start by drilling clearance holes for the shanks (the thick part of the screws) through the tread and then the pilot holes, up into the riser.
Step 2
Next, drill the clearance holes in, using countersink screws. The screws should be positioned just below the surface when screwed into place. You will then need to grab some PVA glue, and apply it into the holes and then fit the screws in tightly. If your stairs are purely wooden or don’t have carpet, then an alternative solution would be to cover the screw heads with wood filler, so that it’s not uncomfortable to walk on.
Step 3
You might find that the loose joint is located further back at the end of the tread. If this is the case, you can reinforce it by using triangular moulding. This method sees the triangular moulding being fixed to both the tread and the riser (45-degree angle). The moulding should be around 12mm x 12mm. Be aware that the tread should not be narrower than 220mm – as this is a regulation size.
Step 4
Alternatively, you can screw two metal brackets into the angle of your stairs (between the tread and the riser). This helps bring the riser and tread together and should stop and prevent your wooden stairs from creaking. To ensure a flush surface, cut out space for the brackets using a hammer or chisel. This is one of the more complex methods, so if this is your first time, research how to properly fit the brackets before tackling the task.
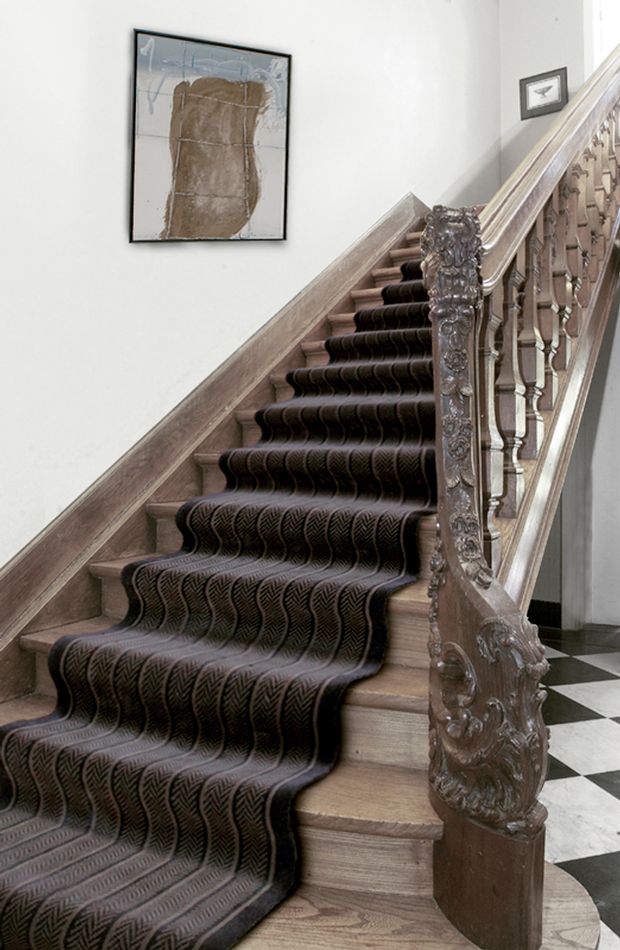
Now Your Stairs are Fixed, Why Not Complete the Look?
It’s not unlikely that once you have fixed the creaks in your stairs that you may be considering renovating them. Staircases experience high volumes of foot traffic and become damaged through this and other wear and tear. You could either consider painting your stairs yourself.
However, regardless of whether you choose to paint your stairs, we’d highly recommend finishing your newly fixed stairs with a stunning carpet runner alongside stair rods and brackets. We have hundreds of designs to choose from and can even create bespoke runners and hallway rugs to transform your entrance area and staircase.
Take a look at our stair runner stock today for some inspiration.